Search This Blog

Monday, December 28, 2015

Strategy for Fabric Busting in the 2016 Pattern Stash Contest


Have you figured out your pattern attack?  I've decided to hit my Seamwork backlog since their sizing runs to accommodate my dimensions, so alterations will be predominantly grading instead of slash and spread.


Now it's time for fabric.  I have a large percentage of my stash occupied by other people's fabric.  Really nice fabric, mind you, but in colour-ways I wouldn't normally pursue.  I am thinking that since I am whipping up what will essentially be wearable muslins I should start with wearable fabric that isn't precious (to me).


In this sort of contest your fabrics should be ready ahead of time: pretreated before you are ready. This step is easy for me. I usually wash my fabrics as they come into the house. I wouldn't say I am paranoid about germs and bed bugs and dust mites and odors (although listing them like that is giving me the jitters) but incoming fabric (especially other people's fabric) gets a run through the washer before it hits my sewing room.

The exception, of course, is wool.  Wool is treated as I sew it.  I have a plan to use a printed wool viscose for a skirt in the coming weeks, so as I psych myself up for THAT, I will be thinking through the prep.  This fabric is NOT a good candidate for the contest: wool easily doubles the time you spend on your project.  The cost,  pressing, shaping, shrinking, steaming, underlining and finishing of wool undermines fast sewing.  I like me a little slow sewing,  so I will probably start preshrinking this fabric this month, but I won't be including this in my contest.  (However, I may make a wearable muslin of the pattern for this contest...).


For the Main January theme for our group, Judy has us addressing our stash and stash organization.  As you prepare for this, consider our supplemental contest: what patterns are you using?   Grab the appropriate fabric for the patterns - don't mess around with the pattern's suggestions: if it says knits, grab a knit, if it says lightweight cotton woven, grab a pretty quilting cotton.  Switching up the fabric adds time for fiddling, adding in ease, and should be done when you are working with a rehearsed pattern.  Unless, of course, you are into self abuse.
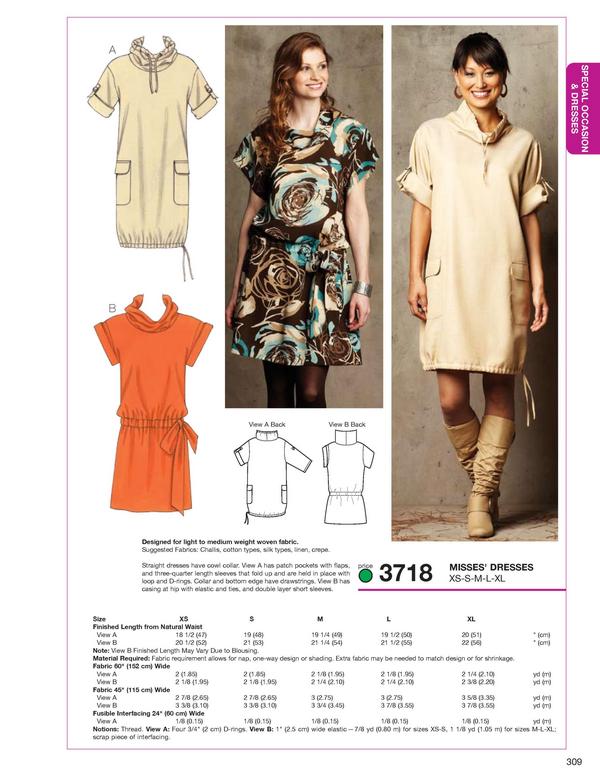

A great strategy would be to pick 5 patterns that use the same fabric, and will use the same needles and thread.  This will mean constant sewing - and if you dedicated and VERY organized - you could cut all the patterns out at once and just sew non-stop.  (Insert hilarious uproar here - I know you exist Super-Sewer,  but that's insane).

 - but the strategy still applies -

If you have a serger, you know what I mean - you sew items that will work with the same serger thread back to back so that you can get away with NOT changing the thread back and forth.  This applies well to the approach to this contest - sew the seams, and switch to a double needle for hemming and hem several items at once - when your thread and needles work on several items, you create a production line environment and find efficiency.

Thursday, December 24, 2015

Strategy for the 2016 Pattern Stash Contest

2016 Pattern Stash Contest
Since this month's Pattern Review contest works so well to bust some stash, we are working together on a little "Contest-along" in our Stashbuster Facebook Group.

In all things competitive it is a good idea to map out a strategy - and here is the utterly essential strategic step:
If you want a chance to win the gift certificate prize, don't forget to
A) BY December 31 REGISTER as a member of PR.com
B) join the contest

So this contest is a quantity contest. Prize 1 of 2 goes to the user who bangs out the highest number of unique pattern review entries.  Prize 2 of 2 is determined by random-lucky draw: each item you enter becomes a ballot.

This means that the number of stashed patterns you crack is the crux, not the quality of your sewing, fitting, personalizing.  The key is to line-up a series of patterns that you can pound out one after another.  

Easy Peasy - make sure you select patterns with quick turnaround time and you're good to go for the PR component. So now we need a stashbuster strategy.

We want to make the most of this opportunity:  Here are some possible approaches
  1. A great way to approach this contest is as a wearable muslin audition. Why not pick 5 similar patterns and a bunch of yardage and make all 5 back to back?   Quickly alter each pattern with standard adjustments,  and move on to the next pattern.  At the end assess each result - chart the results and you might end up with the components for the ideal garment.
  2. how about clearing up a section of your stash?  I have a block of untried Perfect Pattern Parcel patterns - what if I hammered through those?  I may have undiscovered gems in the stash!
  3. Seamwork Patterns!  how many untried patterns do you have from the first 7 months?  These are ideal churners - an hour or two each:
    1. 12/14: Oslo (cardigan), Valencia (bag), Madrid (bag)
    2. 1/15: Manila (leggings), Savannah (cami)
    3. 2/15: Florence (bra), Geneva (panty)
    4. 3/15: Osaka (skirt), Aberdeen (top)
    5. 4/15: Bristol (skirt), Astoria (sweater top)
    6. 5/15: Sydney (topper/shawl), Astoria (dress)
    7. 6/15: Aurora (tank top), Mesa (shift dress)
    8. 7/15: Seabrook (bag), Nantucket (shorts)
  4. Big 4 BOGO and Bundle deals - I bet you have a few!
Any sewn item from an untried pattern you have owned for more than 6 months is eligible!
Go back to the Facebook conversation - what's a strategic approach you can suggest as an approach to the pattern list?  

next up: Fabric and Pattern tracing preparations


Tuesday, December 22, 2015

Birthday Stanley Tree! Hip Hip Hooray!


DS ( the younger ) has a birthday smack in the middle of a much bigger birthday party.  We have plans as he gets older to convert his birthday into a Festivus theme, and to focus on his 1/2 birthday with a start of summer party,  but regardless of competitive events, anybody's birthday should be a big deal.  It's your benchmark day, and things should be done to make that day remarkable.
Stanley Tree From Sewaholic


When Sewaholic released their free Stanley Tree pattern last month, it spoke to me immediately : I was tempted  (yet resisted ) to make one up immediately.  I love Christmas crafts, but with Mrs Claus on my plate I was able to put it aside.  Not dis-similarly, I was intending to "skip" the birthday.  I had surgery scheduled the week approaching Christmas and figured I had enough on my plate. 
Family intervened and declared that the kiddo's birthday
Shall not Pass without acknowledgement
My guy's day is going to be special and toddler themed with plenty of Elmo, even though right now he doesn't seem to know that it's a deal at all.  He has just started recognizing Santa, and loves the "Ella Trees" we see.  ( "Ella" is Christmas Lights. ) Knowing daycare, though: he'll come home this week knowing what a birthday and cake is.


I believe strongly that benchmark days are to be done well, and we are faced with two benchmarks back to back.  So, I reason, the little guy's birthday needs to be differentiated from the big guy's birthday.   I decided, for his birthday, that DS ( the younger )  needs a corner of the house unChristmased and he should have a center piece tree of his own. 


Last week, I gathered together my stashed Hip Hip Hooray ribbon from SIL's gifts (Gymboree clothing store's feature theme for giftwrap )  and headed over to my local quilt supply shop (Stitch by Stitch),  where I will be teaching again this Spring) to select a birthday fabric to coordinate with the ribbon and stand out against the Christmas backdrop of our house.  I don't often succumb to the draw of the quilting cottons, so it was a huge treat to browse  the stacks.  It was an even greater treat to buy enough fabric for a whole project at once for under $15 and churn it back out again immediately.

Spectrix You Are My Sunshine by Debi Hron stood out nicely,  and was priced in my range.
I decided that I could skip the prewash and quickly taped together the brief pdf, and started cutting right away.

The instructions are easy enough, and the pattern is reflective of the amount of detail I saw in my other recent Sewaholic project.  I would recommend this pattern and pdf as a sample of their style before committing to a Sewaholic purchase.  I appreciate the Sewaholic pdf features light grey gridlines even on this 6 page pdf - Gridlines are always a nice reassurement that you haven't gone wonky with your paper trimming.


I stitched up the three sections,  leaving gaps at the notches as suggested, then pressed the heck out of them and notched the edges before I turned them right side out.  I pressed again, and then connected the sections at the central branch.  I stuff the sections as described,  but I used some long strips of poly batting left over from another project, and then backfilled each section with uncooked rice just before I hand-stitched each opening.  The weight added by the rice is a nice touch.


Where we would normally place a star, I put a quickly drafted  varsity-style initial.  I had a box of old school bells that have a great peal, so I decided to use them at the branches and tack them on with my Hip Hip Hooray ribbon.

Finally, I tacked a temporary feature, a 2015 portrait to claim the tree as territory of the kiddo. 
The effect is perfect.  It's clearly a celebration tree. It's a flag all on its own staking Birthday territory and creating a distinct space to celebrate a very special birth, and to capture the benchmarks for 2015.

As normal, there are no affiliate links in my posts - I'm just not that impactful  :)  Links are usually made for interest, expansion on the word, and to explain my obscure cultural references.

Sunday, December 13, 2015

V8620 The Stars Aligned Wool Jacket (and a partial Stash Buster)

Have you ever completed a project and wanted to shout from the rooftops?
I am so happy with my jacket!


Look at my grin!

This jacket - V8620 - a Marcy Tilton design - is Out of Print, but I was very lucky to stumble upon a stash of patterns in the back corner of a home dec store a few weeks ago, and bought a mass of Betzina and Tilton patterns for my own stash.  (That's STAR #1 - Let's keep track!)
Here's the line drawing:
Note the Empire Line and the dropped back.  This is a dreamy shape for my figure!

STAR #2 is my recent and desperate need for a new Winter jacket - something I can throw on and feel stylish in.  I have a few nice leather jackets, but they aren't warm enough for Winter's approach and the ski jackets in my stash are not sexy.  My good, down Winter coat needs a new zipper (and I hate working on repairing down coats).

STAR #3 / 4 / 5?
FABRIC
Last Winter I uncovered a gem in the Value Village Thrift Store - a bizarre, but wonderful felted stripe that was perfect for my BFF's colouring and a cardigan project.  I hoarded the chucks and scraps for someday - I loved the fabric so much.  I believe I paid $8 and change for the yardage.

Then, this Fall I won a yard and a half of a wool coating from Elliott Berman Textiles

And then just a few weeks ago, I was back in my local Value Village and found a sweet chunk of  quilted lining:

Finally, STAR #5!  Pattern Review's Colour Blocking Contest came up in the calendar!

I'm not sure these are stars, but lets call it the universe - there are a few sew-a-longs on the go for coats - the McCall's PeaCoatAlong has just finished, and I followed the posts for that, and there's another on-going for the Clare Coat.  I also followed Beth's coat study on SunnyGalStudio Blog.
I took a Craftsy course: Terry McClintock's Essential Guide to Working With Wool, and read Brooks Anne Camper's Seamwork Post: A Guide to Underlining,


I debated and finally chose to add the step of hand basting the lining to each piece, as I decided to treat it as an underlining for the too soft hand of the coating compared to the unusual felted fabric.  Other than that I followed Marcy Tilton's great directions for the pattern  (but I hand stitched instead of using the stitch in the ditch method proposed and ended up with a wonderful gem!

The final on my model


Front from the inside

Back from the inside

Here's a closeup of the guts.


Can you see the pocket here?

Look at the beautiful cuff!

And - DH,  my honey,  helped by snapping a shot of the jacket in action at the grocery store:


Love Love Love the Jacket!


Tuesday, December 8, 2015

Mrs Claus - A-Line from scratch, M7254 Jacket, and Cypress Cape (Sewaholic)


 Remember the Opportunity?  OMG  I had so much fun!
Nov 21 has come and gone, and I revived my dress-up last Friday for a photobooth The costume worked out really well (that's all explained below).  The wig was a beast (too tight for my head), but the whole rest of the Mrs Claus at the nighttime parade experience was great.


The costume is designed for wearing outside in wintry weather, so you really don't want to be lazing about the house in costume. As pick-up time approached - my lovely friend and family assisted with bobby pins, white hair spray, safety pins and a kilt pin - we moved so fast we didn't manage to get decent readying pictures before we flew off into the parade grounds.  Santa is a fantastic date, and surprising mountain of a man - I felt like a little pixie next to him!  The float is  gorgeous, and the sleigh is made of (presumably aircraft) metal.  I was picked up at 3pm and got home at 11 - and it was a hoot!

The wig tops off the costume, my hair (as much as I already have a haircut suitable for Mrs Claus) is just too mousy for that silver foxette.  It's a Marie Antoinette wig and I pinned up a few of the dangly locks, and added a holly sprig to my bun.

I rescued a pair of glasses from the Tickle Trunk and found my Santa pin from the hospital auxiliary.  My tall winter boots did nicely, too.  Under it all I wore some awesome Columbia Omni Heat base layer (long underwear of sorts) featuring a candy stripe (I was being funny) and my Omni Heat white gloves.


But what of the incredible costume project?

The Skirt
 I used my A-Line skirt block.  Because the fabric was an upholstery grade velveteen/chenille I added an inch to the side seams, and an inch and a half to the center back.  I put in a heavier zipper than one would normally use for a skirt, but it needed to carry the weight of the skirt.  I used my curved waistband and made that sucker extra wide.  I faced the waistband in a solid canvas.  I wasn't risking anything with a lost securement, and after debating all the possibilities I decided to use a kilt pin for the fastener.

The weight of the skirt was totally reasonable for a costume piece, and actually cut the windchill very well.  The fabric held up and there were no wrinkles.

I had contemplated adding a hem band in fur, but this was unnecessary and with the potential of snow would have only reduced the longevity of the skirt.  If I ever get wear at the hem, I will edge in fur.


The Cardigan-Jacket


The main warmth layer for my upper body - the Cardigan jacket was made out of a fabric labelled Reptile-Fur on the Halloween clearance table.  In the photo of the fabric you can see the embossed texture on the fur - it IS reminiscent of crocodile or alligator.

It was a beast to cut this fabric - SUCH a mess.  I have a central vac and I really made use of it when I was working on this project.  I still have white fibers showing up on everything I sew.

The pattern for the cardigan is M7254 View C

The fabric has some stretch, but I interfaced the collar as per the directions to maintain the height to the roll of the collar.  I bought some red toggles for the jacket from Prym  - but the toggle straps separated from the tab - I restitched one, but decided not to rely on them.  I backed it all up with a safety pin (horrors!)

The cardigan was easy to make, and I love the process - I have used the Julia Cardigan until this project - I think I will shift to this pattern for future easy pieces.

The fur collar worked quite well for the costume,

 The Cape
The Cypress Cape is a doozy to prepare, but a joy to sew.
 Sewaholic Cypres Cape in red PUL from SimplifiFabric
55 pages of PDF!  I was seriously stressed about cutting this fabric.  I was worried that the project would get lost in my sewing room.  I was worried that it was too big.  The PUL scared me a little as it was so much finer (only 3mil) than what I had worked with in the past.   I finally sucked it up and started piecing the pdf, and then sorting out my layout for my work table.My worktable and rotary cutting mat were smaller than several of the pieces, so I rehearsed the layout and plan in my upstairs hallway.  I considered tracing the pattern onto the fabric, but decided to use weights and paper to cut piece by piece on the board, shifting the sleeve (the biggest piece and only one that was larger than my cutting mat in both length and width).

Now to the cape itself. - This is a gorgeous pattern:  The drafting is spot-on, the sleeves are clever and the hood has a lovely functional shape (it give you a great scope of view) - another sewist commented that it could be snugger to the face (but I have a big head - it was perfect for me)  I didn't test pulling it over the wig....

Notches matched, seamlines matched, and it went together beautifully.  I fumbled at the instructions for the opening - I will revisit the directions and let you know if it was chicken or egg, but be warned to take that step carefully.


Here's the whole caboodle:
The formal Mrs Claus pose


The full profile costume

check out the white eyebrows, and the candy striped base layer
(ugh, and the tight wig)

Here I am rounding up the vagrant elves!